How to Create Bookings, Send Quotes, and Manage Your Pipeline
Bookings are the heartbeat of everything you do as a travel agent. Every client trip, every quote, every dollar tracked — it all starts with a booking. This guide walks you through creating them, sending quotes your clients can accept with a single tap, and keeping your entire pipeline organized so nothing slips through the cracks.
Creating a Booking — Step by Step
Creating a booking in Pixie Dust CRM is a guided, multi-step process. You won't have to guess what comes next — the form walks you through everything. Here's what each step looks like.
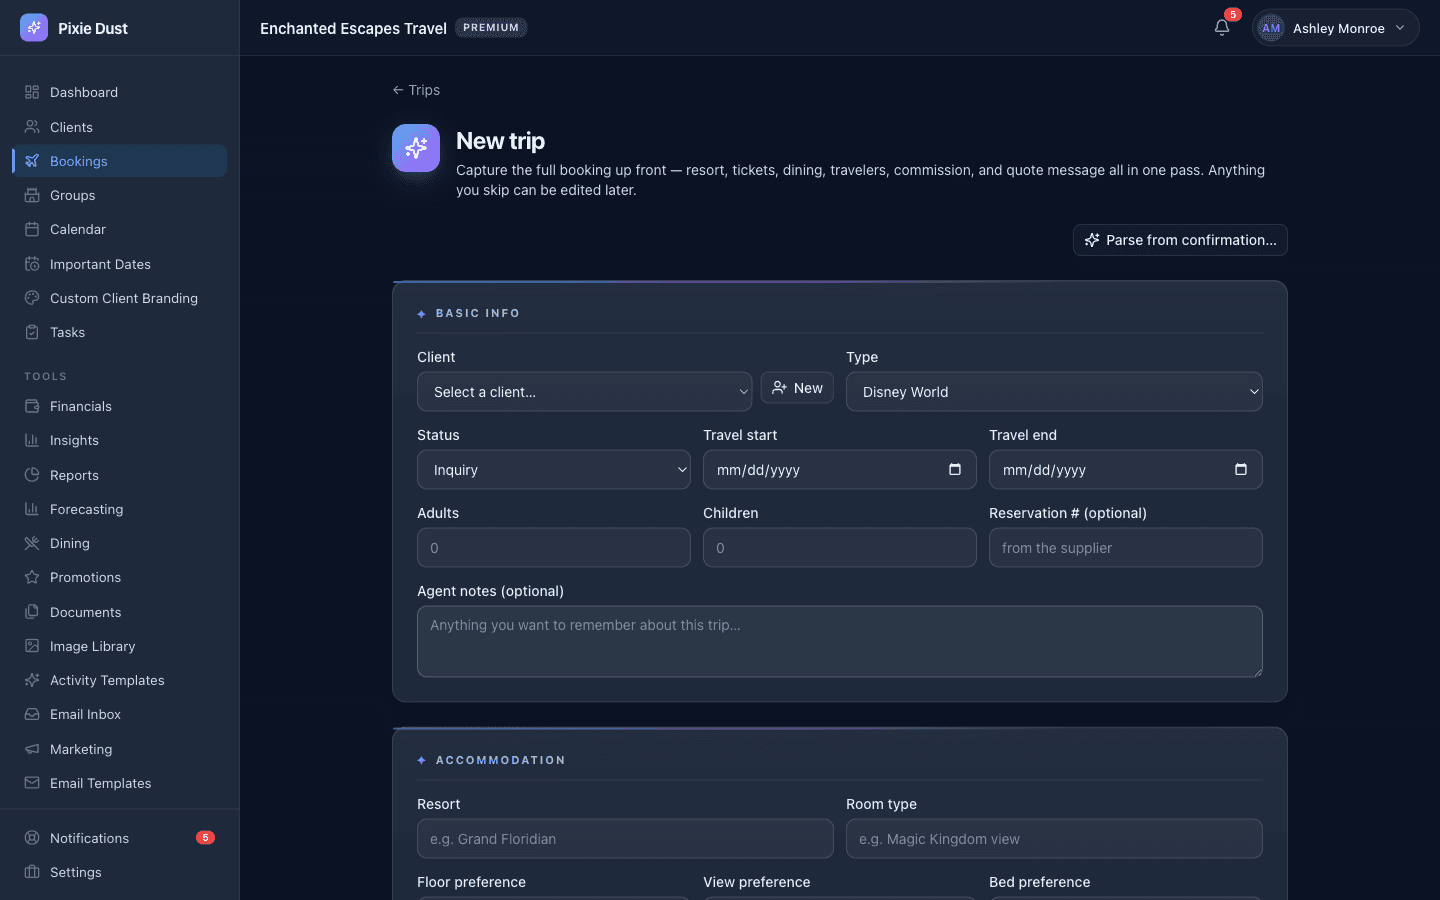
1Basic Info
Start by picking a client. You can select someone from your existing client list or create a new client right from this screen — no need to leave the booking form.
Next, choose the booking type. Your options include Disney World, Disneyland, Universal, Disney Cruise, Carnival, Royal Caribbean, or a Combined trip (for multi-destination vacations).
Then set your travel dates and add each traveler with their name and age. This info feeds into itineraries, ticket calculations, and the client's trip view later on.
2Resort & Accommodation
Enter the resort name and room type. If the resort is a Disney property, flip on the Disney Resort toggle — this helps the system tailor features like dining reservation date calculations later.
3Tickets & Add-Ons
Set the number of tickets per person, the number of park days, and whether you're including Lightning Lane or Memory Maker. These details show up on the client's trip view so everyone stays on the same page.
4Dining
Choose a dining plan type if applicable, and add any dining reservations you've already made. These reservations will also appear on the client's trip timeline.
5Pricing
Enter the total price and deposit amount for the trip. These numbers feed into your pipeline revenue tracking and financial dashboard.
Good to know: Pixie Dust CRM does not process payments. The pricing fields are there so you can record and track amounts — think of them as your personal ledger, not a payment gateway.
Sending Quotes
Quotes are just bookings with a message attached. Instead of committing straight to a confirmed trip, you send your client a proposal they can review and accept — right from their phone.
Create a booking like normal
Fill out the same multi-step form described above. All the trip details — resort, dates, travelers, pricing — get bundled into the quote.
Add a quote message
Write a personal note to your client explaining the trip, highlighting what makes it special, or noting anything they should know before accepting.
Your client receives it in the app
The quote shows up as a “Pending Quote” right on their home screen. They can review all the details at a glance.
They accept (or decline) with a tap
One tap is all it takes. When they accept, the booking status moves forward automatically — no manual updates on your end.
Tip: You can also print a nicely formatted summary of any quote or booking. Great for clients who want something on paper, or for your own records.
Understanding Your Pipeline
Every booking moves through a series of statuses. Think of it as a visual timeline for each trip — from first contact to happy client.
Inquiry
A client has expressed interest but nothing is booked yet.
Quoted
You've sent a quote and are waiting for the client to respond.
Deposited
The client has put down a deposit and the trip is in motion.
Confirmed
Everything is locked in — resort, dates, and details are set.
Final Payment
The remaining balance is due — the finish line is in sight.
Completed
The trip is done. Time to follow up and start planning the next one.
Cancelled
The booking was called off. It stays in your records for reference but drops out of your active pipeline.
Change a status from the booking detail screen — just tap the current status and pick the next one.
On the web dashboard, you get a Kanban board view — columns for each status, cards for each booking, and revenue totals at the top of every column so you can see your pipeline value at a glance.
Status changes can trigger workflow automations — like sending a notification when a booking moves to “Confirmed” or reminding you to follow up after “Completed.”
Important Dates You Won't Miss
One of the trickiest parts of managing Disney trips is keeping track of all the date windows — dining reservations, Lightning Lane purchases, final payments. Pixie Dust CRM calculates these for you automatically.
Dining Reservation
60 days before check-in
Lightning Lane
7 days before check-in
Final Payment
Custom date you set per booking
Create a booking with travel dates
As soon as you set the check-in date, the system does the math.
Important dates auto-calculate
Dining reservation windows, Lightning Lane dates, and your custom final payment deadline all appear automatically.
You and your client both see them
These dates show up on your Calendar, generate notifications so you never miss a window, and appear on your client's trip view in the app.
Tip: You don't have to memorize any of these windows. Just enter accurate travel dates and let the CRM handle the rest. Your clients will think you have a superhuman memory.
Editing a Booking
Plans change — and when they do, updating a booking takes just a few seconds.
Open the booking
Find it in your bookings list, your pipeline board, or directly from the client's profile.
Tap the edit icon
You'll see it at the top of the booking detail screen. One tap opens every field for editing.
Change any field and save
Update dates, swap resorts, add travelers, adjust pricing — whatever you need. Hit Save and you're done.
Good to know: Changes are reflected immediately — both on your dashboard and in your client's app. No sync delays, no “refresh to see updates.” What you save is what they see.
Ready to Try It Yourself?
Plans from $9.99/month for solo agents. Scalable plans for host agencies.
See Plans & Pricing